My mom was an excellent cook, and unlike any other Soviet woman I knew she was truly bold – with spices, flavours and experimentation. During her travels (she worked in geology), she’d fallen in love with the black-eyed people from the Caucasus mountains, and their food.
It may end up becoming a story, so skip straight down to the best & easiest meat qutabs recipe if that’s what you’re here for.
When I was a kid, we were poor, and since neither of my parents were members of the communist party, we also lacked proper access to “deficit” items like decent meat, fruit etc. This, however, was never felt and even as a child I was acutely aware of the fact that our family ate better than any of my friends did.
And I mean waaaaay better.
My mum had made friends with what seemed like every single Georgian, Azeri and Armenian man transporting goods to local markets, thus ensuring a steady flow of exotic herbs and spices. I bet the fact she was a tall blonde with cornflower blue eyes didn’t hurt, either… So, unlike my friends’ kitchens that contained just salt and pepper, our spice cabinet was full to the brim – and my mum could turn a simple cabbage into something utterly delicious 10 different ways. Qutabs, chebureks, chahohbili, ardei umpluti, chicken fat garlic rice and lagman – albeit with heavily Estonified names and sometimes reflecting the poor choice of goods available at the time – were regulars on our table. This is also what I crave when it’s cold, or stressful, or I am just enjoying a lazy weekend at home.
Today was that day.
Besides, cooking foods I grew up with is my love language.
Qutabs are like extra large fried pelmeni or quesadillas, but better.
Qutabs are extremely easy to make, and they are perfect if you’ve started to dream about fried pelmeni (but have no access to Russian shops, nor desire to fiddle with making your own).
While qutabs usually are more spiced than pelmeni, the overall concept is the same – and the meat juices steaming up the inside of a chewy, crispy fried shell…. mmmmmmh, it still hits THAT sweeeeeeet sweeet spot!
Some compare them to empanadas (as similar as any soft pastry can be to a filled flatbread, so: NOT) or quesadillas (well, the most common qutab version is filled with spinach and cheese, and the shape is similar, though the flavour profile is quite different).
If it was autumn and sweet pointy bell peppers were in season, I would have made paprika adjika to go with my qutabs – but it’s winter, so pomegranate molasses had to do.
Azeri (lamb) meat qutab recipe:
Ingredients:
Filling:
- 200g lamb mince + 100g pork mince*
- 2 onions
- 3 gloves of garlic
- A generous handful of herbs** – I go with coriander, parsley and mint
- A spoonful of water
- Spices: a teaspoon of each: cumin, smoked paprika (I prefer the hot version), black pepper and turmeric. If you have, add a teaspoon of khmeli suneli, but not obligatory. Adjust the quantities to your preferences.
- Sumac, pomegranate molasses or pomegranate seeds: optional but recommended
- Salt (or, better yet: a lamb stock cube!)
Dough:
- A mug full of plain flour
- Boiled water (hot)
Replacements:
* Since lamb mince is not always easy to find, use whatever mince you can – but make sure it’s not too lean (or you’ll need to add a generous spoonful of softened butter, or mix it with pork mince like I do).
** Use whatever herbs you like. There are no rules, only preferences. Traditional Azeri herbs are mint, coriander, spring onion and dill; but parsley, basil and tarragon are also used.
Prepwork:
Both the dough and filling need to rest (an hour will do). Start by boiling some water – you’ll need it for both.
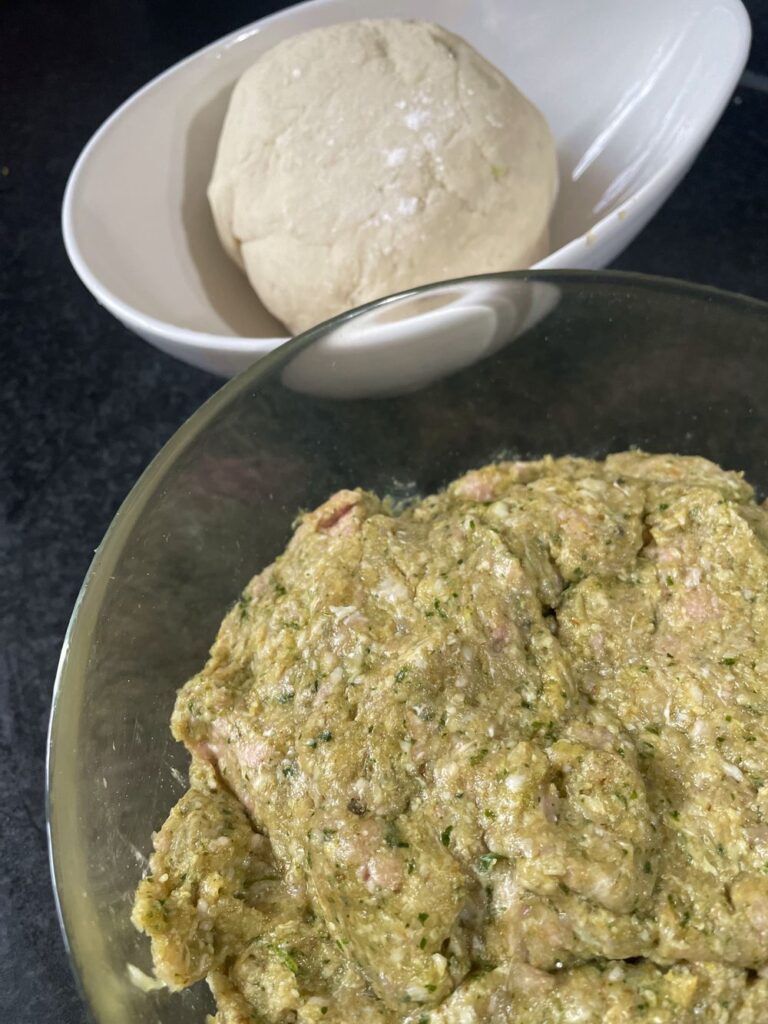
Quarter the onions, chop up garlic and then whisk them into a blender with all the herbs, stock cube (if using) and about two tablespoons of hot water. Add all the spices you planned to use, and a tablespoon of pomegranate molasses (if using) and then blitz it to a grainy loose puree. You need the filling to look “green”, so if anything, go a bit overboard with the herbs!
If you do not have a blender, just chop-chop-chop (and add the water once you’re ready to mix it with the meat). As long as you do not have long strings of herbs and large bits of garlic to chew later, you’ll be fine. Mix the onion puree with the mince and then taste it. It’s fine, you won’t die touching raw meat, honestly: just think of it as steak tartar! The amount of salt should be “just right” for eating it as is.
In terms of consistency, you want the filling to feel soft and easily spreadable – so add a bit more water if needed.

Cover the meat bowl with a lid or cling film, and let it marinate on the counter: you want the meat to come to a room temperature before making the pastries anyway.
While the meat sits, make the dough. I am not great at “making a well” style of dough making, so I use my loyal cast iron pot instead. Chuck in a mugful of all-purpose-flour, and add half a mug of hot water. Mix it in (with a spoon if it’s too hot) and then knead a bit: it should come together and be sticky, but not loose. Add as much water as you need, and if you overdo it, add flour.
You need the dough ball to be the size of a small grapefruit/large orange for the qutabs.
Once you can knead and stretch it a bit, take it out of your bowl and knead on the table for a minute or so, until everything is evenly combined and it can hold its ball shape. Cover with cling film, and let it rest – for half an hour at least, even better if you can go for an hour.
Filling and frying the qutabs:
To assemble the qutabs, you need to knead the dough again (don’t overdo it, just knead until it feels silkier than before and has no lumps, then stop). Once done, roll it out as thin as possible but still able to hold the filling. A euro coin thickness is ideal. Flour the surface (sparingly) and also rub some flour over your rolling pin: you don’t want the dough to end up being dry but you also want to be able to get it off your counter…
If you want to make large qutabs, find a plate or a bowl or a pot lid that is about 20% smaller than the pan you’ll fry the qutabs on, and use it as a mould to cut out the dough (using the back of a knife works well). You’ll be stretching out the dough once filled, so don’t be tempted to make them the size of your pan to start with 😀
NB! It’s vital that you lift the pastry disc up and flip it before adding the filling – or you’ll risk it sticking to the table later!
I 100% recommend you do a small test qutab first! This way, you’ll know whether you want more or less filling, and whether the seams hold, or if you need to add a bit of salt or up the sourness with pomegranate or sumac.
Spread the filling evenly on one side of the pastry circle, leaving the edges bare. The filling should be about 2-3 times thicker than the dough (but don’t be tempted to go too bulky or they’ll split open during frying). Once the filling is spread, cover it with the other side of the dough and pinch the edges to seal the filling in. NB! Squeeze out excess air when sealing the dough – and it also helps if you flatten the finished qutab with the palm of your hand (or use a rolling pin if you’re brave) before sealing the last corner. And to make sure your seals will hold, wet the edges with your finger, first.
IF you were using pomegranate seeds or sumac (instead of the molasses in the filling), sprinkle them evenly on the filling before closing the qutab! It’s also good to test how much sourness you enjoy with your test qutab 🙂
To fry, heat your thickest-bottomed pan to a medium-high heat, then turn the heat down a bit and put the qutab on a DRY pan. Let it sit and blister, undisturbed, for 2 minutes – and flip over when the dough has brown blisters all over. If the blisters are black, turn the heat down a bit. If you see some parts of the qutab white or brown, but the areas between the blisters look semi-opaque, you need to fry it a bit longer or you may need to turn up the heat.
Don’t worry if the qutabs start to leak – especially if you used pomegranate seeds. Try sealing the next ones more securely (i.e. use your fork to reseal the edges), and do a quick half-hearted wipe of the pan before you add the next lot onto it. No need to wash it, but if you leave too much leakage on the pan, it’ll leave black burn marks on your next qutabs.
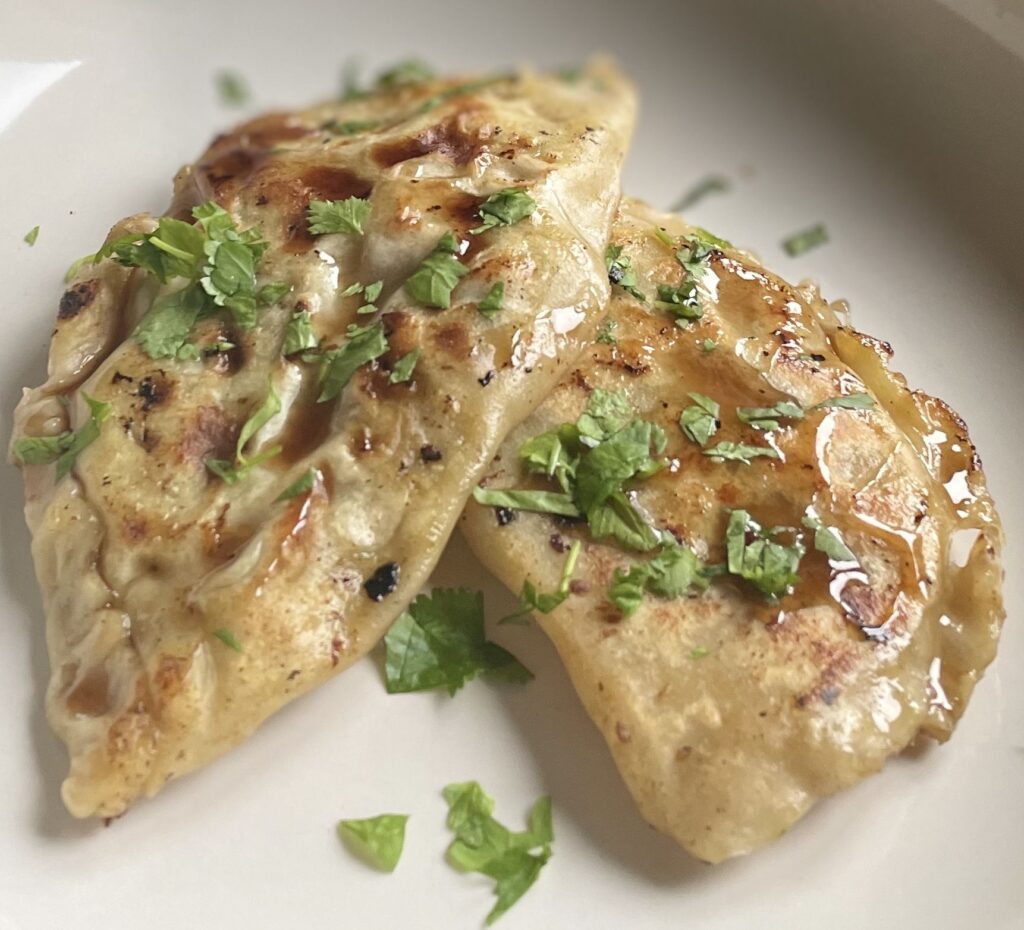
Check my pic for proof: I forgot to take a picture of the first ones, and this is from the last batch.
I’ve used no butter: the shine comes from leaked broth (plus I’ve drizzled some pomegranate molasses on top – it’s the caramel-coloured super-shiny stuff on the right side). You can also see a few black blisters that are not due to overcooking, but me not having wiped the pan before the last fry-up.
This time, I made all my qutabs “test size” (using a small bowl as my guide) – better for portion control and more comfortable to eat. Served with some pomegranate molasses drizzled over the top, and leftover coriander.

If you’re frying in batches, place the ready qutabs into a bowl and cover with a lid, and layer the next lot on top of them.
Top tips:
- This quantity will make you enough for 4 people, possibly with leftovers.
- You can freeze the cooked qutabs (separate them with a piece of baking paper between each layer, wrap tightly in cling film and freeze) – and reheat in a hot oven straight from frozen.
- Apparently, you can also freeze them raw, but this would not be my choice.
- Qutabs – due to fatty meat – are to be eaten hot! Reheat in the microwave or a pan if needed.
- If you were a total pro, and none of the filling leaked, rub a bit of butter over the dry bits of your qutab. No need if your filling already leaked and buttered the pastry 😀
Ps. I’m happy to report that I managed to uphold the time-honoured tradition of going through a panic attack in the middle of filling making (it’s not enough, it’s NOT enough!) and ended up with 4 times what I actually used… Basically, enough to make qutabs for a small army. As you can see from the photo above… But such is life, and I guess it’s not the worst thing ever to have meatball pilaf (modified Uzbek palov) for dinner tomorrow night.


